WPC Wall Panels
WPC wall panels offer durable, stylish, and low-maintenance solutions for interiors and exteriors. Ideal for modern construction and decorative projects .
Products
WPC Wall Panels
WPC Wall Panels — WPC Wall Panels are Wood-Plastic Composite cladding panels engineered for modern interior feature walls, TV backdrops, office accent walls, and hotel lobbies. Easy to install, water-resistant, and termite-proof — they deliver the look of premium wood with none of the maintenance issues in Kenyan climates.
WPC Wall Panels in Kenya
WPC Wall Panels are a modern, stylish, and highly durable wall finishing solution increasingly used across Kenya for both interior and exterior applications. Designed using advanced Wood Plastic Composite technology, these panels combine the natural beauty of wood with the strength and low-maintenance benefits of engineered materials. As construction trends shift toward long-lasting and visually appealing finishes, WPC wall panels have become a preferred choice for homeowners, architects, interior designers, and developers.
In Kenya’s residential, commercial, and hospitality sectors, WPC wall panels are widely used to enhance living rooms, offices, hotels, restaurants, showrooms, and exterior facades. Unlike traditional timber, paint, or gypsum boards, WPC panels resist moisture, termites, warping, and fading—making them ideal for Kenya’s varying climate conditions, from coastal humidity to dry inland regions.
At Burhani Hardware Dealers (BHD), we supply premium WPC Wall Panels in Kenya that meet modern design standards while offering durability, ease of installation, and long-term value. Whether you are upgrading an interior space or cladding an exterior wall, BHD provides reliable products backed by expert guidance and nationwide delivery.
WPC Wall Panels in Kenya – Overview & Specifications
WPC wall panels are engineered wall cladding and decorative panels manufactured from a blend of wood fibers and thermoplastics. This composition creates a stable, strong, and visually appealing product suitable for a wide range of architectural and interior design applications.
What Are WPC Wall Panels?
WPC (Wood Plastic Composite) wall panels are designed to replicate the warmth and texture of natural wood while eliminating common issues such as rotting, cracking, moisture absorption, and termite damage. They are factory-finished, color-stable, and ready for installation, reducing on-site labor and finishing time.
These panels are commonly used as an alternative to timber cladding, painted walls, wallpaper, PVC panels, and gypsum boards in modern Kenyan construction projects.
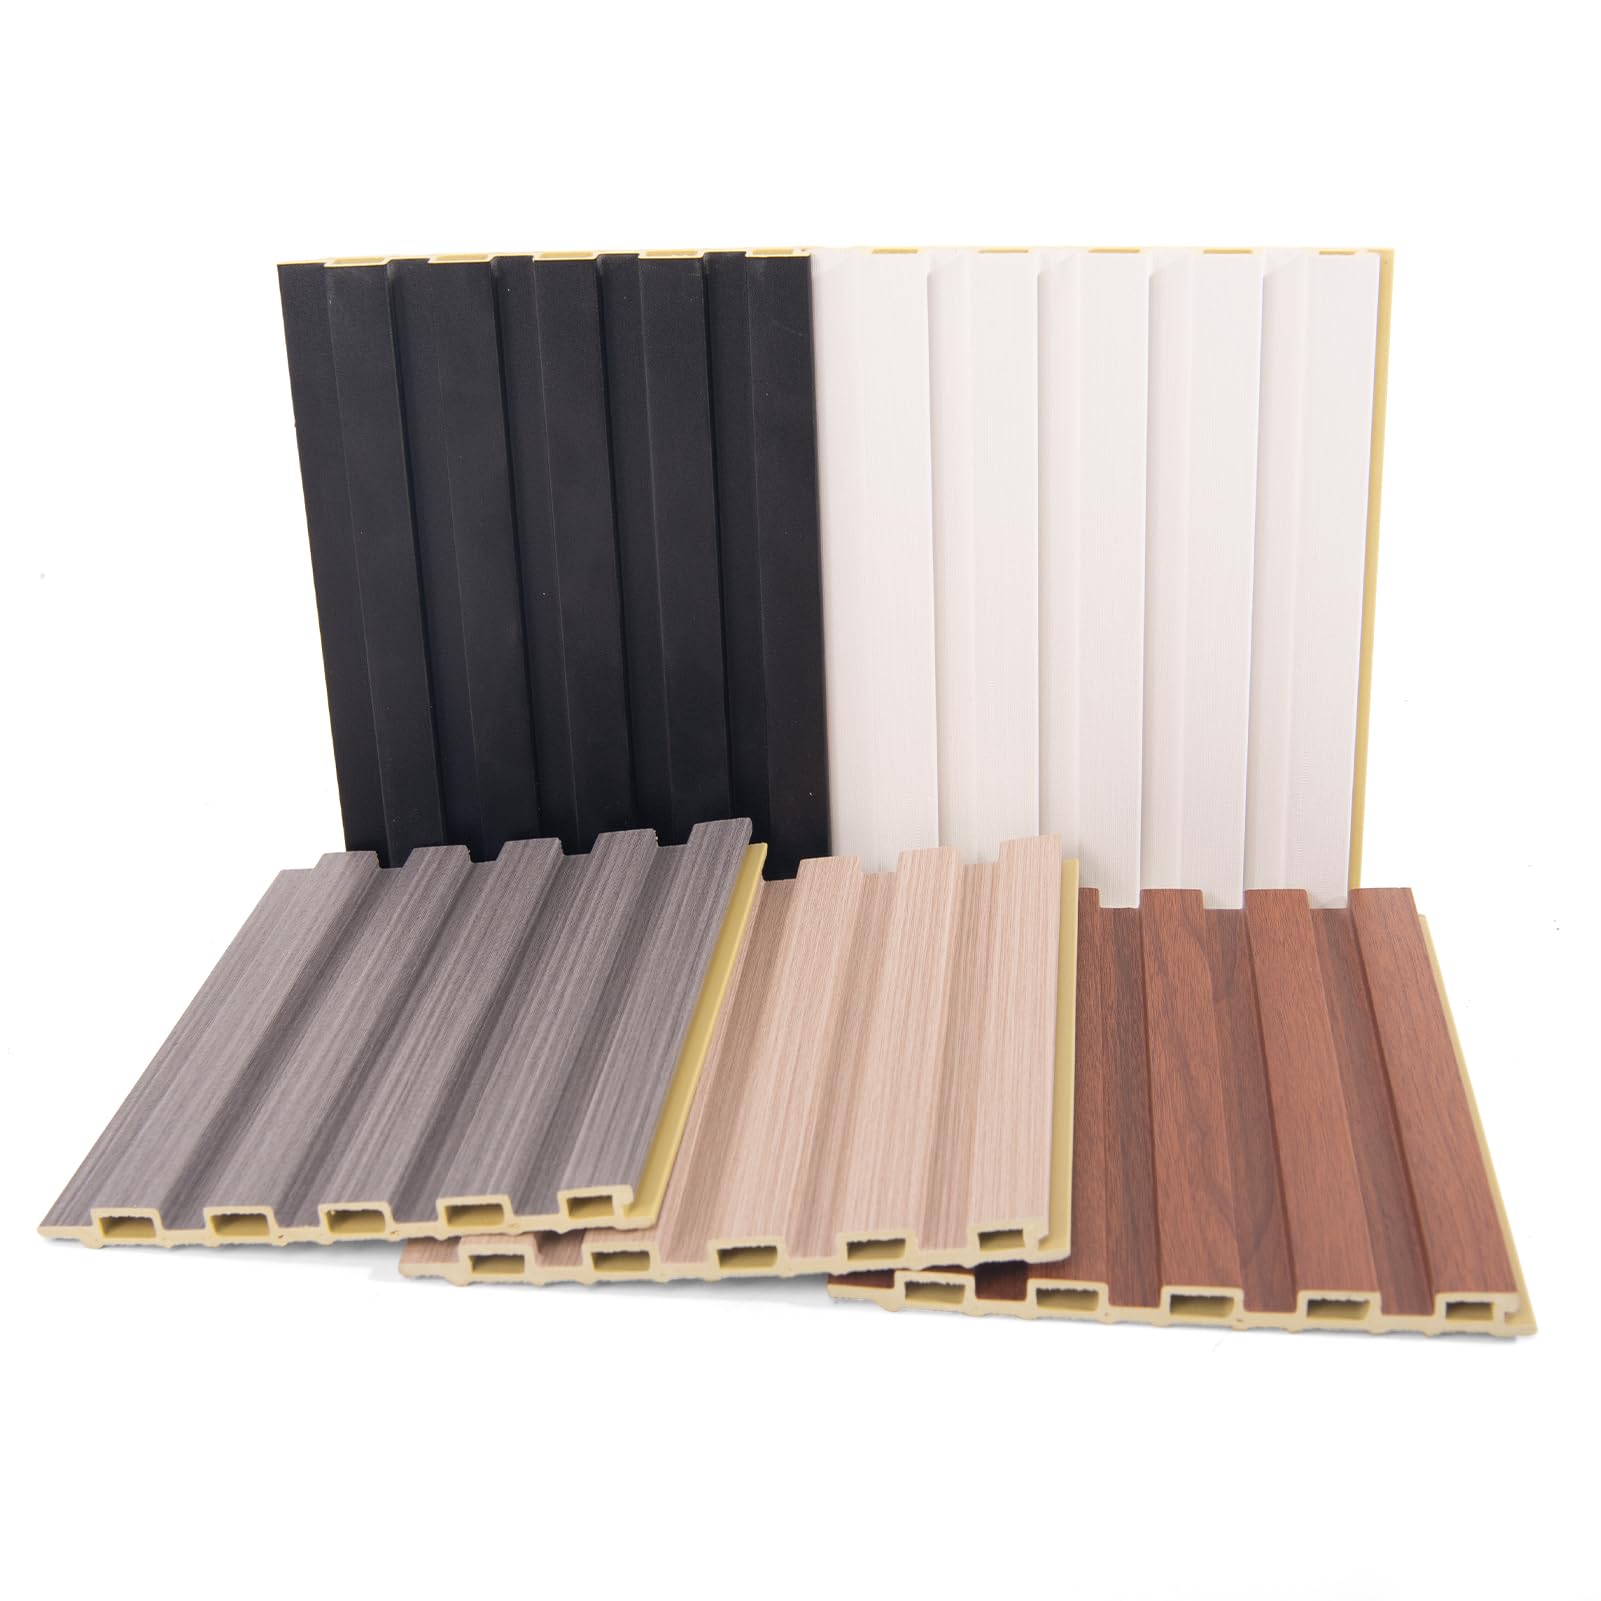
Common Designs, Sizes & Finishes
WPC wall panels are available in a wide range of profiles and finishes to match different design preferences:
-
Fluted and slatted wall panel designs
-
3D textured decorative panels
-
Smooth and wood-grain finishes
-
Popular colors such as teak, walnut, oak, grey, charcoal, and coffee brown
Panels are manufactured for consistent sizing and easy installation using clips, screws, or adhesive systems, making them suitable for both new builds and renovations.
Uses of WPC Wall Panels in Interior & Exterior Applications
WPC wall panels are versatile and suitable for residential, commercial, and outdoor use.
Interior Feature Walls & TV Units
One of the most common uses of WPC wall panels in Kenya is for interior feature walls. They are ideal for:
-
Living room TV backdrops
-
Bedroom accent walls
-
Dining areas and corridors
-
Reception areas and lounges
Their modern appearance adds depth and character to interiors while reducing the need for frequent repainting.
Office & Commercial Interiors
Corporate offices, retail outlets, and commercial buildings use WPC wall panels to create professional, durable, and visually consistent interiors. The panels help maintain a clean appearance even in high-traffic areas.
Hotels, Restaurants & Hospitality Spaces
WPC wall panels are widely used in hotels, cafes, and restaurants due to their premium look and durability. They enhance ambience while offering resistance to moisture, stains, and everyday wear.
Exterior Wall Cladding & Facades
Exterior-grade WPC wall panels are designed to withstand weather exposure and UV rays. They are suitable for:
-
Building facades
-
Balcony walls
-
Boundary walls
-
Outdoor feature walls
These panels provide long-lasting beauty without the maintenance demands of natural timber.
Cost of WPC Wall Panels in Kenya
The price of WPC wall panels in Kenya varies depending on design, quality, thickness, and whether the panel is intended for interior or exterior use.
Factors Affecting Price
Panel Design & Profile
Decorative fluted or 3D panels generally cost more than flat designs due to their enhanced aesthetics.
Thickness & Material Density
Thicker, high-density panels offer better durability and sound insulation, influencing pricing.
Interior vs Exterior Grade
Exterior WPC wall panels are priced higher because they include UV stabilizers and weather-resistant properties.
Supplier Quality & Support
Purchasing from a trusted supplier like BHD ensures consistent quality, accurate specifications, and long-term value.
Although WPC wall panels may have a higher initial cost compared to paint or wallpaper, they provide excellent value through durability, low maintenance, and long service life.
Durability & Performance of WPC Wall Panels
Moisture & Termite Resistance
WPC wall panels do not absorb water, making them ideal for humid areas such as coastal regions, kitchens, and commercial interiors. They are also termite-resistant, eliminating one of the biggest challenges of natural wood in Kenya.
Strength & Impact Resistance
Engineered for stability, WPC panels resist cracking, warping, and deformation. This makes them suitable for both residential and high-traffic commercial environments.
Long-Term Performance in Kenyan Climate
From hot inland regions to humid coastal zones, WPC wall panels maintain their shape, color, and performance over time, making them a reliable choice for long-term installations.
Choosing the Right WPC Wall Panels for Your Project
Residential Homes & Apartments
Homeowners use WPC wall panels to enhance interior spaces with minimal maintenance. They are perfect for feature walls, entertainment areas, and modern home interiors.
Commercial & Corporate Projects
Developers and contractors prefer WPC wall panels for offices, malls, and mixed-use developments due to their uniform finish, fast installation, and long-term cost efficiency.
Architectural & Aesthetic Applications
Architects and interior designers appreciate WPC panels for their flexibility in design. They allow creative wall treatments that align with contemporary, minimalist, and luxury aesthetics.
Why Buy WPC Wall Panels from BHD?
Premium Quality & Modern Designs
At Burhani Hardware Dealers (BHD), we supply high-quality WPC wall panels selected for durability, visual appeal, and ease of installation. Our panels meet modern construction and interior design standards.
Trusted Supplier Across Kenya
BHD is trusted by contractors, interior designers, developers, and homeowners nationwide. Our reputation is built on quality products, transparent pricing, and dependable service.
Expert Advice & Reliable Support
Our experienced team helps you choose the right WPC wall panels based on your application, design goals, and budget. We support both small residential projects and large commercial installations.
Order WPC Wall Panels in Kenya – Nationwide Delivery
Looking to buy WPC Wall Panels in Kenya quickly and reliably? BHD offers fast service within Nairobi and efficient nationwide delivery to major towns including Mombasa, Kisumu, Nakuru, Eldoret, Thika, and surrounding regions.
You can visit our showroom, request pricing, or consult our team for professional recommendations tailored to your project requirements.
Buy Premium WPC Wall Panels from BHD Today
Burhani Hardware Dealers (BHD)
burhanihardwaredealers [at] yahoo.com
+254 731 217 462 | +254 704 606 131
Industrial Area, Funzi Road, Nairobi
Need WPC Wall Panels?
Contact us for pricing, specifications, and delivery options across Kenya.